Color, Place and Imagination
Free to teach, adapt and share in your classroom.
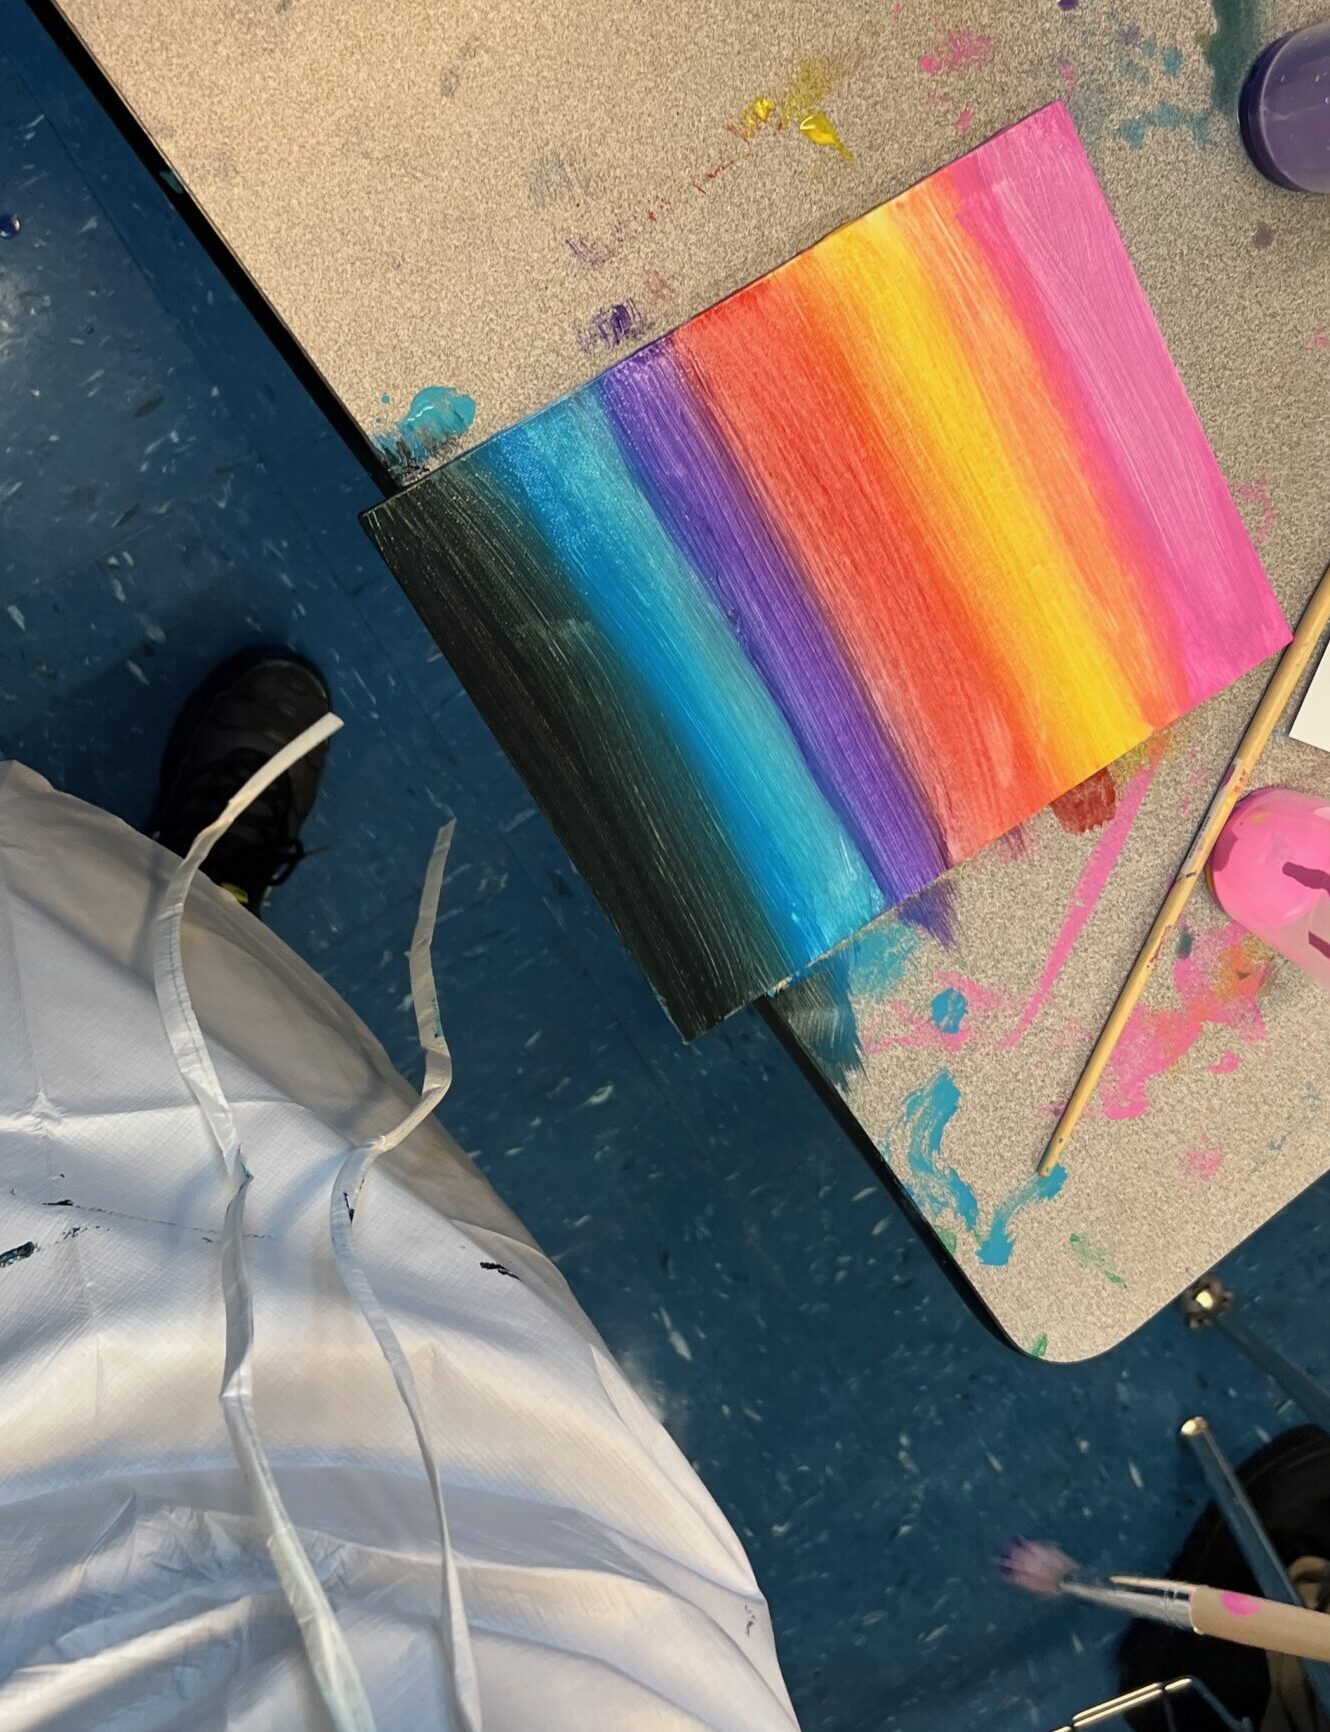
- Grade 6–8
- Subject Visual Arts
- Duration 11 sessions · 45 min
- Instructor Mr. George
Overview
Unit Context: Color, space and place · painted papers, near and far, and a focal point · a 9 × 12-inch painted-paper collage of a real, remembered or imagined place
Big Idea
Color and space change the way a place feels. Students mix and test a small palette, paint a shared library of collage papers, learn to show near and far with overlap, relative size and placement, and assemble a place whose colors and layout direct how a viewer reads it.
The central question is: How can color and space change the way a place feels?
Students choose the place, the palette, the viewpoint and how abstract to make it. A room, a landscape, a gathering space or an invented environment is as valid as a city street. Nobody is asked for a home address, private memories or photographs of their home, and an invented place is always allowed.
Each student keeps four pieces of evidence alongside the final collage: a small color test, a spatial plan, a viewer-feedback note and a revision explanation. All grades use the same process and materials, and the expectations rise with grade level as shown below.
This unit is related to The Block: Places We Call Home but stands on its own as the color-focused route. It looks closely at painted color, value and depth rather than at found paper and community stories.
Planning status: This is a fully timed plan written for the 2026–27 school year. It has not been reported as classroom-tested, so rehearse the wet-day cleanup with your actual sinks and drying space first.

- Grade 6 Choose a place and palette, and explain one visible overlap or color relationship.
- Grade 7 Compare two spatial solutions and use a focal point deliberately.
- Grade 8 Communicate a particular viewpoint about a place and use audience interpretation to justify a revision.
Offer more complex perspective by readiness, not by grade.
Unit at a Glance
| # | Session and goal | Time |
|---|---|---|
| 1 | Color and placeConnect a visible color or spatial choice with an interpretation of a place. | 45 min |
| 2 | Color mixing tests (wet)Mix and record a small palette that supports an intended atmosphere. | 45 min |
| 3 | Painted paper library (wet)Use controlled paint coverage and marks to make papers for collage. | 45 min |
| 4 | Depth with paperShow near and far relationships through overlap, relative size and placement. | 45 min |
| 5 | A plan for your placeSelect a composition and palette that communicate an intention. | 45 min |
| 6 | Composition before glueCompare loose arrangements at final size before committing. | 45 min |
| 7 | Layers and focal pointAssemble layers in an order that preserves depth and directs attention. | 45 min |
| 8 | Details with a purposeAdd selected details that make the place more specific. | 45 min |
| 9 | Viewer interpretationUse specific audience observations to choose a revision. | 45 min |
| 10 | Revision and careComplete an evidence-based revision and resolve attachment or edge problems. | 45 min |
| 11 | Places on displayPresent a resolved collage with an evidence-based explanation. | 45 min |
| 11 sessions | 495 min |
Artworks for Looking
Romare Bearden, The Block, 1971. A six-panel collage of a Harlem block by the Black American artist, in the collection of The Metropolitan Museum of Art. The Met describes everyday routines alongside joyful and difficult parts of urban life. Students point to the details that help them imagine life there. Do not assign one feeling to everyone who lives on the block.
Alma Thomas, The Eclipse, 1970. An acrylic painting by the Black American painter and educator, inspired by the 1970 solar eclipse, in the Smithsonian American Art Museum. Students look at repeated marks and neighboring colors. Compare it with Bearden’s recognizable street without ranking abstraction against representation.
Project the works from the museum pages and do not redistribute the images. Warm and cool colors do not carry one universal emotion, so different readings count as information when students point to visible evidence.
NYS Visual Arts Standards Alignment
Suggested alignment for grades 6–8. Confirm the exact indicator wording against your standards document.
- VA:Cr2.1.6a–8a Creating: experimenting with materials and ideas. Paint tests, the painted-paper library and two spatial arrangements (Sessions 2–4, 6).
- VA:Cr3.1.6a–8a Creating: reflecting on and revising work. Viewer reading and an evidence-based revision (Sessions 9–10).
- VA:Re8.1.6a–8a Responding: interpreting art using visual evidence. Bearden and Thomas (Session 1); partner readings (Session 9).
- VA:Pr5.1.6a–8a Presenting: preparing and presenting work, with labels and a considered display (Session 11).
Instructional Outcomes (Objectives)
- Studio / Experiential Students will mix a small palette, paint collage papers with controlled coverage, and assemble a place that shows near and far through overlap, relative size and placement.
- Cognitive / Analytical Students will connect a visible color or spatial choice to a reading of a place, and compare two arrangements before committing.
- Reflective / Communicative Students will use a viewer’s specific observations to choose a revision or justify keeping a choice, then label the work with one decision a viewer can see.
Key Vocabulary
- Place / collage / palette / mood Session 1.
- Hue The color family. (Session 2)
- Value / tint How light or dark a color is; a color lightened with white. (Session 2)
- Coverage / texture / brushwork How evenly paint covers, the surface it makes, and the marks the brush leaves. (Session 3)
- Overlap One shape covering another’s edge, which suggests it is in front. (Session 4)
- Foreground / background The near and far parts of a picture. (Session 4)
- Relative size A smaller version of a comparable object can suggest distance. (Session 4)
- Composition / focal point / intention How parts are arranged, where the eye goes first, and what the artist wants it to do. (Session 5)
- Scale / negative space / arrangement Size relationships, the open space around shapes, and their placement. (Session 6)
- Layer / contrast Back-to-front assembly order, and a noticeable difference that draws attention. (Session 7)
- Detail / repetition / specificity A selected feature that makes a place particular. (Session 8)
- Interpretation / evidence / feedback A viewer’s reading, the visible feature behind it, and a response the maker can use. (Session 9)
- Revision / craftsmanship / curation A purposeful change, care with materials, and choices about display. (Sessions 10–11)
Materials & Resources
- Tempera: one shared palette per table with small amounts of two primaries and white. The teacher adds a tiny amount of black only when a test calls for it. Test your actual pigments, because primary mixtures differ by brand.
- Brushes and water: one brush per student and stable water cups shared between pairs.
- Papers: heavy scrap for paint tests, about 6 × 9-inch sheets for painted papers, 9 × 12-inch backing sheets, and colored paper as a dry backup.
- Assembly: pencils, markers, scissors, glue sticks, clean scrap for pressing, and a named envelope and section folder for each student.
- Drying and storage: labeled drying positions by section; dry papers sorted into broad color families; clean reserve paper for absences.
- Teacher prototype: one small collage with a saved palette test, loose background and foreground pieces, and two spatial arrangements.

Wet Days, Re-entry and Sketchbook Time
- Wet sessions (2 and 3) Keep sketchbooks on dry tables, label the backs of papers before painting, and do not stack damp papers. Students keep a personal swatch; larger papers join the shared library once dry.
- Longer cleanup option If the room needs a longer reset, finish painting at 30 minutes, wash and record next actions from 30 to 35, reflect at cleared tables from 35 to 38, and store and check from 38 to 45. If wet access cannot run safely, switch to a dry palette-comparison route and schedule a supported mixing turn.
- Re-entry after absence The shared paper library means a returning student can start at once: choose a place, test two loose arrangements and record a color decision. Prioritize one resolved work and a reasoned revision over catching up on every missed activity.
- Weekly sketchbook time Once each teaching week, protect 8 minutes (25–33) for everyone’s independent dry sketchbook inquiry, then 33–35 to save the next unit action. The daily 0–4 arrival choice continues. Private pages stay private.
Differentiation
- Fine-motor and access supports Larger brushes, paper taped to a tray, premixed starting hues, reusable building and landform silhouettes, a two-layer depth route, torn edges chosen on purpose, and a partner who moves pieces at the maker’s direction.
- Multilingual learners Pointing and one word count before full sentences. Ingredient labels can be colored-pencil dots. Oral explanations, scribing or labeled sketches are accepted as full evidence.
- Social-emotional and privacy Invented places are always allowed. Feedback is read before the maker shares an intention, and makers share only what they choose. Private teacher sharing is an alternative to public display.
- Readiness extension Optional one-point perspective, with receding edges meeting at one vanishing point on a horizon, in a small group. It is never a class prerequisite.
Anticipated Misconceptions
Misconception Colors have fixed emotions: blue is sad, red is angry.
Intervention Treat associations as readings, not facts. Partners read a swatch before hearing the intended mood and point to the color relationship that made them feel it.
Misconception Anything small or high on the page is far away.
Intervention Keep objects comparable: a small real object is not automatically distant. Trace the covered edge with a finger as evidence of what is in front.
Misconception Better art means more detail and smoother cutting.
Intervention “You can improve a work by leaving a space open.” Ask what each detail helps a viewer understand. Realism and detail counts are not graded.
Instructional Sequence
Eleven 45-minute sessions. Every class follows the same shape: sketchbook choice (0–4), look and learn (4–10), make (10–22), a quick check (22–25), develop (25–35), reflect (35–38) and a seven-minute reset (38–45). Sessions 2 and 3 are wet painting days; Sessions 4–11 keep the room in a scissors-and-glue setup.
Session 1Color and place
45 min
Today, I can… connect a visible color or spatial choice with an interpretation of a place.
Materials today: Bearden and Thomas projected with captions; sketchbooks, pencils and a few colored paper scraps; the small teacher prototype.
Your sketchbook choice
Students choose an independent dry sketchbook inquiry. Keep paint and glue closed during arrival.
“Choose something you want to investigate for these four minutes. You may continue an earlier idea.”
Romare Bearden, The Block
Silent looking, then observations of people, buildings and inside and outside spaces. Identify The Block (1971) and that the projected image is a detail of a six-panel work.
“A place can hold many stories. Point to a detail that helped you imagine life here.”
Alma Thomas, The Eclipse
Name Thomas, a Black American painter and educator, and this acrylic painting inspired by the 1970 solar eclipse. Discuss repeated marks and neighboring colors, and compare with Bearden without ranking abstraction against representation.
“Thomas painted these marks. We will paint papers and arrange them into a place of our own.”
A place you can choose
Reveal the teacher collage. The city is one direction; a room, a landscape, a gathering space or an invented setting is just as valid.
“Choose a place you want to explore. You can invent one without sharing personal information.”
Check: Every student has a place in mind, real or invented.
Two possible places
Students make two quick thumbnails and place a few paper colors beside each. Scraps stay loose.
“A thumbnail is a thinking sketch. Test an idea before investing in details.”
An intention to revisit
Students keep their thumbnails and a provisional intention that may change after the color tests.
“Save one visual choice you want to test next.”
The seven-minute reset
38–39: record the next physical action. 39–42: store work flat and loose shapes in named envelopes; close glue, return scissors (on wet days, brushes rinsed and blotted, paint returned). 42–44: sort reusable scraps, clear tables, check the floor. 44–45: check tool counts and section folders; the teacher dismisses.
“Keep your plan and loose pieces with your work so you can return to it.”
Misconception Students assume one feeling for everyone in Bearden’s block.
Intervention Ask for a detail that supports each reading, and accept more than one.
Session 2Color mixing tests (wet)
45 min
Today, I can… mix and record a small palette that supports an intended atmosphere.
Materials today: Small test strips, pencils, tempera (two primaries and white per table), one brush per student, stable cups per pair. Rehearse the cleanup first.
Your sketchbook choice
Students choose an independent dry sketchbook inquiry. Keep paint and glue closed during arrival.
“Choose something you want to investigate for these four minutes. You may continue an earlier idea.”
A controlled paint test
On scrap, mix two primaries in a small clean area, change their proportions for a second mixture, and add a little to white for a tint. Show rinsing and blotting between mixtures. Name hue as the color family and value as lightness.
“Keep the first test. Change one ingredient or its amount so you can see what caused the difference.”
Your palette trials
Students make a small set of swatches, including one tint or value change, labeled with words, colored-pencil dots or teacher scribing. Paint stays at assigned tables.
“Use small amounts. Your test should help you mix a color again.”
Color and interpretation
Partners view swatches without hearing the intended mood first, then give an association and a reason.
“Which relationship helped you read that feeling?”
Check: Each pair names a color relationship behind their reading.
A palette decision
Students choose two or three colors and test one adjustment, then save a small labeled palette card. Check mixing control and reasons, not neatness.
“Choose colors because of what they do together.”
A recipe worth saving
Students record a recipe and where the wet test will dry. Sketchbooks stay at dry tables.
“Leave yourself enough information to return to this color.”
The seven-minute reset
38–39: record the next physical action. 39–42: store work flat and loose shapes in named envelopes; close glue, return scissors (on wet days, brushes rinsed and blotted, paint returned). 42–44: sort reusable scraps, clear tables, check the floor. 44–45: check tool counts and section folders; the teacher dismisses.
“Keep your plan and loose pieces with your work so you can return to it.”
Misconception Mixing every available color together.
Intervention Give one primary pair and white, plus one clear adjustment such as “more white.”
Session 3Painted paper library (wet)
45 min
Today, I can… use controlled paint coverage and marks to make papers for collage.
Materials today: About 6 × 9-inch painting papers, limited palettes, brushes, labeled drying slots, teacher test papers and colored-paper backup.
Your sketchbook choice
Students choose an independent dry sketchbook inquiry. Keep paint and glue closed during arrival.
“Choose something you want to investigate for these four minutes. You may continue an earlier idea.”
A paper surface
Demonstrate a thin, even coat with an ordinary brush, then a separate area of visible directional marks. Avoid puddles.
“Make a paper we can cut later. Try a surface that supports the place you imagine.”
Papers for a place
Each student paints up to two small sheets from the tested palette. Papers dry fully before stacking or cutting; early finishers return to dry sketchbook work.
“Keep your color intention in mind while you choose the marks.”
Coverage check
Students tilt the sheet safely and notice puddles or scrubbing. Exposed paper can be an intentional texture.
“Which part will be useful in your collage?”
Check: No puddles left on drying papers.
A useful variation
Students complete a needed variation and move work to named drying slots, keeping the personal palette sample separate.
“Make a useful difference instead of filling another sheet automatically.”
The shared paper agreement
Confirm which papers are personal evidence and which join the library. Log preferred color families.
“Everyone will have papers to choose from, including students who join us later.”
The seven-minute reset
38–39: record the next physical action. 39–42: store work flat and loose shapes in named envelopes; close glue, return scissors (on wet days, brushes rinsed and blotted, paint returned). 42–44: sort reusable scraps, clear tables, check the floor. 44–45: check tool counts and section folders; the teacher dismisses.
“Keep your plan and loose pieces with your work so you can return to it.”
Misconception Scrubbing a weak surface to fix it.
Intervention Blot puddles with scrap paper under guidance and stop scrubbing. Use colored-paper backup if drying space runs out.
Session 4Depth with paper
45 min
Today, I can… show near and far relationships through overlap, relative size and placement.
Materials today: Fully dry papers sorted by color family; two sizes of one simple tree or building and a background rectangle; scissors, glue sticks, scrap envelopes.
Your sketchbook choice
Students choose an independent dry sketchbook inquiry. Keep paint and glue closed during arrival.
“Choose something you want to investigate for these four minutes. You may continue an earlier idea.”
Near and far
Place a large and a small version of the same shape on a flat background. Overlap one edge, then reverse the overlap.
“Watch what changes when I move one piece. Which edge gives you evidence?”
Two spatial arrangements
Students arrange two near-and-far solutions before gluing, sketching the first before moving it.
“Try overlap first. Then test size or placement.”
The depth test
Partners identify near and far before the maker explains, pointing to an edge or a size comparison.
“What made that piece appear closer?”
Check: Partners point to the covered edge or size comparison as evidence.
A deliberate space
Students save one depth study with a short note. Teach one-point perspective to a small group only, as an option.
“Your place needs a clear spatial decision. Complex perspective is one option.”
Evidence of depth
Students save both trials or a record of them.
“Keep the evidence that helped you choose.”
The seven-minute reset
38–39: record the next physical action. 39–42: store work flat and loose shapes in named envelopes; close glue, return scissors (on wet days, brushes rinsed and blotted, paint returned). 42–44: sort reusable scraps, clear tables, check the floor. 44–45: check tool counts and section folders; the teacher dismisses.
“Keep your plan and loose pieces with your work so you can return to it.”
Misconception Small or high on the page always means far away.
Intervention Keep objects comparable and trace the covered edge with a finger. If a student keeps the space flat on purpose, ask how they will direct attention instead.
Absent last time? Use the shared paper library to start at once: choose a place, test two loose arrangements and record one color decision.
Session 5A plan for your place
45 min
Today, I can… select a composition and palette that communicate an intention.
Materials today: 9 × 12-inch backing papers, planning scraps, pencils, sorted dry papers, saved mood tests and depth studies, and a loose teacher arrangement with two possible focal areas.
Your sketchbook choice
Students choose an independent dry sketchbook inquiry. Keep paint and glue closed during arrival.
“Choose something you want to investigate for these four minutes. You may continue an earlier idea.”
A focal area
Revisit the Bearden detail for more than one focal area, then move a contrasting shape in the prototype to redirect attention.
“Our smaller works can guide a viewer toward one important area.”
Two plans for one place
Students make two quick thumbnail layouts, choose a palette and label a near-and-far relationship. Grade 8 names a viewpoint such as welcoming, crowded or changing.
“Which arrangement helps someone understand your place?”
A planning conference
Check four to six students while peers use the same question: the place, the palette reason and the spatial strategy.
“Point to the decision that carries your idea.”
Check: Each conferenced student leaves with one next move.
The selected plan
Students mark the chosen plan, collect a modest palette of papers and cut only major pieces.
“Choose enough paper to test your idea and leave choices for others.”
Ready to compose
Plan, swatch and backing are stored together in the section folder.
“Name the next physical action so you can restart quickly.”
The seven-minute reset
38–39: record the next physical action. 39–42: store work flat and loose shapes in named envelopes; close glue, return scissors (on wet days, brushes rinsed and blotted, paint returned). 42–44: sort reusable scraps, clear tables, check the floor. 44–45: check tool counts and section folders; the teacher dismisses.
“Keep your plan and loose pieces with your work so you can return to it.”
Misconception Taking far more paper than the plan needs.
Intervention Limit selection to two color families, and remind students that the library is shared.
Session 6Composition before glue
45 min
Today, I can… compare loose arrangements at final size before committing.
Materials today: Dry paper library, plans, backing papers, scrap envelopes, scissors, and a limited number of glue sticks for after the check.
Your sketchbook choice
Students choose an independent dry sketchbook inquiry. Keep paint and glue closed during arrival.
“Choose something you want to investigate for these four minutes. You may continue an earlier idea.”
Large shapes first
Model positioning the background and large forms, then moving one to change the open space. Small details wait until the structure reads.
“First solve the big relationship. Details can follow.”
Your first arrangement
Students lay out a full-size arrangement with glue closed, using the thumbnail while allowing useful changes.
“Try your plan at the size of the final work.”
A second arrangement
Students test one alternative and compare, recording the first before moving it.
“Which version serves the place you want to show?”
Check: Every student has two arrangements to compare.
A first commitment
After a composition check, glue only the broadest background pieces. Demonstrate a thin, even glue layer and pressing with clean scrap.
“Commit to the parts you have tested. Save flexibility where you still need it.”
A saved arrangement
Backing stored flat and loose shapes in the named envelope; one unresolved decision recorded.
“Leave yourself a clear way back into the composition.”
The seven-minute reset
38–39: record the next physical action. 39–42: store work flat and loose shapes in named envelopes; close glue, return scissors (on wet days, brushes rinsed and blotted, paint returned). 42–44: sort reusable scraps, clear tables, check the floor. 44–45: check tool counts and section folders; the teacher dismisses.
“Keep your plan and loose pieces with your work so you can return to it.”
Misconception Gluing every piece before testing an alternative.
Intervention Offer two concrete moves to test first: enlarge one form, or open more space around it.
Absent last time? Use the shared paper library to start at once: choose a place, test two loose arrangements and record one color decision.
Session 7Layers and focal point
45 min
Today, I can… assemble layers in an order that preserves depth and directs attention.
Materials today: Glue sticks, scissors, dry papers, named folders, teacher pieces in clear back-to-front order, dry pressing scrap and spare backing.
Your sketchbook choice
Students choose an independent dry sketchbook inquiry. Keep paint and glue closed during arrival.
“Choose something you want to investigate for these four minutes. You may continue an earlier idea.”
Layer order
Lay three pieces over each other, then lift them to show assembly order. Glue from background toward foreground.
“Before gluing, name what goes underneath.”
Your collage layers
Students assemble the main forms, keeping the focal area visible. Conference on one edge or placement at a time.
“Step back after each major layer. Does the space still read as you intended?”
First look
Partners look and point without the maker explaining; the maker compares the response with the intention.
“What drew your eye there?”
Check: Each maker hears where a viewer’s eye went first.
A stronger focal area
Students test a contrasting scrap, a larger form or more open space before gluing the change.
“Try the change loose. Keep it if it helps your place communicate.”
A useful change
Students record or point to a before-and-after decision.
“Your reason matters as much as the added piece.”
The seven-minute reset
38–39: record the next physical action. 39–42: store work flat and loose shapes in named envelopes; close glue, return scissors (on wet days, brushes rinsed and blotted, paint returned). 42–44: sort reusable scraps, clear tables, check the floor. 44–45: check tool counts and section folders; the teacher dismisses.
“Keep your plan and loose pieces with your work so you can return to it.”
Misconception Gluing a foreground piece first and losing the overlap.
Intervention Number the backs of three pieces, and leave one corner unglued briefly while checking position.
Session 8Details with a purpose
45 min
Today, I can… add selected details that make the place more specific.
Materials today: Markers, scissors, colored scraps, existing work, and an optional repeated-shape demonstration.
Your sketchbook choice
Students choose an independent dry sketchbook inquiry. Keep paint and glue closed during arrival.
“Choose something you want to investigate for these four minutes. You may continue an earlier idea.”
A telling detail
Look closely at one area of the Bearden detail and ask which visible feature adds to the place. Do not turn the artwork into a checklist to copy.
“A useful detail tells us something about this particular place.”
Details for your intention
Students add selected cut forms, drawn lines or repeated marks, and decide what to leave out. There is no minimum detail count.
“Before adding it, ask what this detail helps a viewer understand.”
The whole composition
Students view the work at arm’s length and compare the detail’s effect with the original focal area.
“Where does your eye go now? Is that useful?”
Check: Students check the focal area still leads.
A selective finish
Students simplify clutter, repeat a useful rhythm or move an unglued detail. Encourage deliberate stopping.
“You can improve a work by leaving a space open.”
An intentional detail
Students save a short explanation of one detail and its role.
“Name what the detail contributes.”
The seven-minute reset
38–39: record the next physical action. 39–42: store work flat and loose shapes in named envelopes; close glue, return scissors (on wet days, brushes rinsed and blotted, paint returned). 42–44: sort reusable scraps, clear tables, check the floor. 44–45: check tool counts and section folders; the teacher dismisses.
“Keep your plan and loose pieces with your work so you can return to it.”
Misconception More detail always makes it better.
Intervention Cover a busy area temporarily with loose paper and compare. Students may leave a calm area without texture.
Session 9Viewer interpretation
45 min
Today, I can… use specific audience observations to choose a revision.
Materials today: Works with the makers’ intentions covered until after the first response, feedback slips, pencils, and the teacher collage for modeling.
Your sketchbook choice
Students choose an independent dry sketchbook inquiry. Keep paint and glue closed during arrival.
“Choose something you want to investigate for these four minutes. You may continue an earlier idea.”
Evidence before advice
Practice interpreting Thomas’s color relationships, separating visible evidence from personal association. Model the same routine on the teacher collage.
“Different viewers may read a place differently. Useful feedback explains why.”
A partner reading
Partners view the work before hearing the intention and record one spatial observation and one color or mood reading. Makers then share only what they choose.
“Listen for what your choices are communicating.”
Intention and response
Makers compare the response with their intention. A difference can prompt a change, or a reason to keep some ambiguity.
“Which observation will help you decide your next move?”
Check: Each maker names one observation they will act on.
A revision trial
Students test a removable paper overlay, a new position or a value change with dry paper, and record the effect before gluing.
“Change something specific so you can see whether it helps.”
A revision plan
Students save the trial and the feedback together.
“Make the next action small enough to begin immediately next class.”
The seven-minute reset
38–39: record the next physical action. 39–42: store work flat and loose shapes in named envelopes; close glue, return scissors (on wet days, brushes rinsed and blotted, paint returned). 42–44: sort reusable scraps, clear tables, check the floor. 44–45: check tool counts and section folders; the teacher dismisses.
“Keep your plan and loose pieces with your work so you can return to it.”
Misconception Feedback that is a verdict (“it’s good”) instead of a reading.
Intervention Model pointing first, then one word, then the reason. A teacher conference or written exchange can replace speaking aloud.
Absent last time? Use the shared paper library to start at once: choose a place, test two loose arrangements and record one color decision.
Session 10Revision and care
45 min
Today, I can… complete an evidence-based revision and resolve attachment or edge problems.
Materials today: Feedback, revision trials and collages; glue sticks, repair scraps, pressing papers and markers; one lifted edge and one optional overlay prepared.
Your sketchbook choice
Students choose an independent dry sketchbook inquiry. Keep paint and glue closed during arrival.
“Choose something you want to investigate for these four minutes. You may continue an earlier idea.”
A change with evidence
Demonstrate a revision that strengthens a covered edge or focal contrast, comparing before and after.
“Revise toward your intention. Name the evidence that led you here.”
Your chosen revision
Students carry out the saved revision on one area, using an overlay if removing glued work would damage it.
“Use your feedback note as a starting point, then check the actual effect.”
Another viewer check
The previous partner or the teacher gives a second short reading.
“What visible feature changed your reading?”
Check: Students record whether the change helped.
Edges and attachment
Students check lifting corners and unintended glue marks, keeping intentional torn edges, texture and open space.
“Care means making the materials serve your choices.”
Before and after
The feedback and revision explanation stay with the work.
“Save evidence of the decision, even when the change is small.”
The seven-minute reset
38–39: record the next physical action. 39–42: store work flat and loose shapes in named envelopes; close glue, return scissors (on wet days, brushes rinsed and blotted, paint returned). 42–44: sort reusable scraps, clear tables, check the floor. 44–45: check tool counts and section folders; the teacher dismisses.
“Keep your plan and loose pieces with your work so you can return to it.”
Misconception Every work needs the same fix, or revision never ends.
Intervention An unchanged reading can lead to a justified decision to keep a choice. Smooth cutting is care, not meaning.
Session 11Places on display
45 min
Today, I can… present a resolved collage with an evidence-based explanation.
Materials today: Final works, tests, plans and feedback records; small title labels; a display area students can reach.
Your sketchbook choice
Students choose an independent dry sketchbook inquiry. Keep paint and glue closed during arrival.
“Choose something you want to investigate for these four minutes. You may continue an earlier idea.”
A title and a reason
Model a short label with title, medium and one color or space decision. Credit Bearden and Thomas only as learning influences, never as authors of student work.
“Tell viewers about a choice they can see. You decide how much personal context to share.”
Finishing and selecting
Students finish small repairs and select a color test, a plan and a revision record, then prepare the label and choose the display orientation.
“Your trials help tell the story of your decisions.”
A considerate display
Small groups test spacing and viewing height before teacher-approved mounting, keeping labels with the right works.
“Give each work room and keep the artist’s chosen orientation.”
Check: Labels are matched to the correct works.
Looking at our places
A quiet gallery walk or table exchange. Students discuss one visible relationship, then reflect on their own work against the four criteria.
“Name a choice you learned to control and a question you want to keep exploring.”
Your next inquiry
Students record one idea to carry into sketchbook work or the next unit.
“Choose a question worth returning to.”
The seven-minute reset
38–39: record the next physical action. 39–42: store work flat and loose shapes in named envelopes; close glue, return scissors (on wet days, brushes rinsed and blotted, paint returned). 42–44: sort reusable scraps, clear tables, check the floor. 44–45: check tool counts and section folders; the teacher dismisses.
“Keep your plan and loose pieces with your work so you can return to it.”
Misconception Display means wall mounting only.
Intervention Offer table display or a folder review when wall mounting is inaccessible, and private teacher sharing for personal content.
Closing Reflection Prompt
Name a choice you learned to control in color or space, and a question you want to keep exploring. Write it, sketch it with a label, or say it in your conference.
Assessment & Reflection
- Intention and meaning A place or mood intention connected to a visible choice.
- Visual organization Purposeful color and space relationships, including a focal area and a clear near-and-far decision.
- Control of the taught process Controlled mixing, or an accessible equivalent, plus secure assembly.
- Reflection and revision A reasoned response to a viewer’s feedback, whether that is a change or a justified decision to keep a choice.
Developing work needs a concrete next move. Resolved work uses its choices coherently. Extending work tests alternatives and explains their consequences. Do not grade realism, speed, behavior, detail counts or access supports as artistic quality. Oral explanations, scribing and labeled sketches are accepted.
Related Lessons
The Block: Places We Call Home is the community and found-paper route through the same theme. Pattern, Symmetry and Meaning builds the watercolor testing and arrangement habits used here.
Sources & Credits
Unit design and session plans: Kacy George, Unit 4 “Color, Place & Imagination,” 2026–27, grades 6–8. Color-and-feeling routines and paint tests build on KC George’s earlier Courage in Color unit. The optional one-point perspective extension and the overlap-first assembly approach are adapted from The Art of Education University’s Collage in Perspective lesson; no lesson-pack images or materials are reproduced here. Artworks: Romare Bearden, The Block, 1971, The Metropolitan Museum of Art; Alma Thomas, The Eclipse, 1970, Smithsonian American Art Museum. Photographs: KC George’s art-education coursework archive; they show material explorations, not student outcomes.