Clay: The Seated Figure
Free to teach, adapt and share in your classroom.
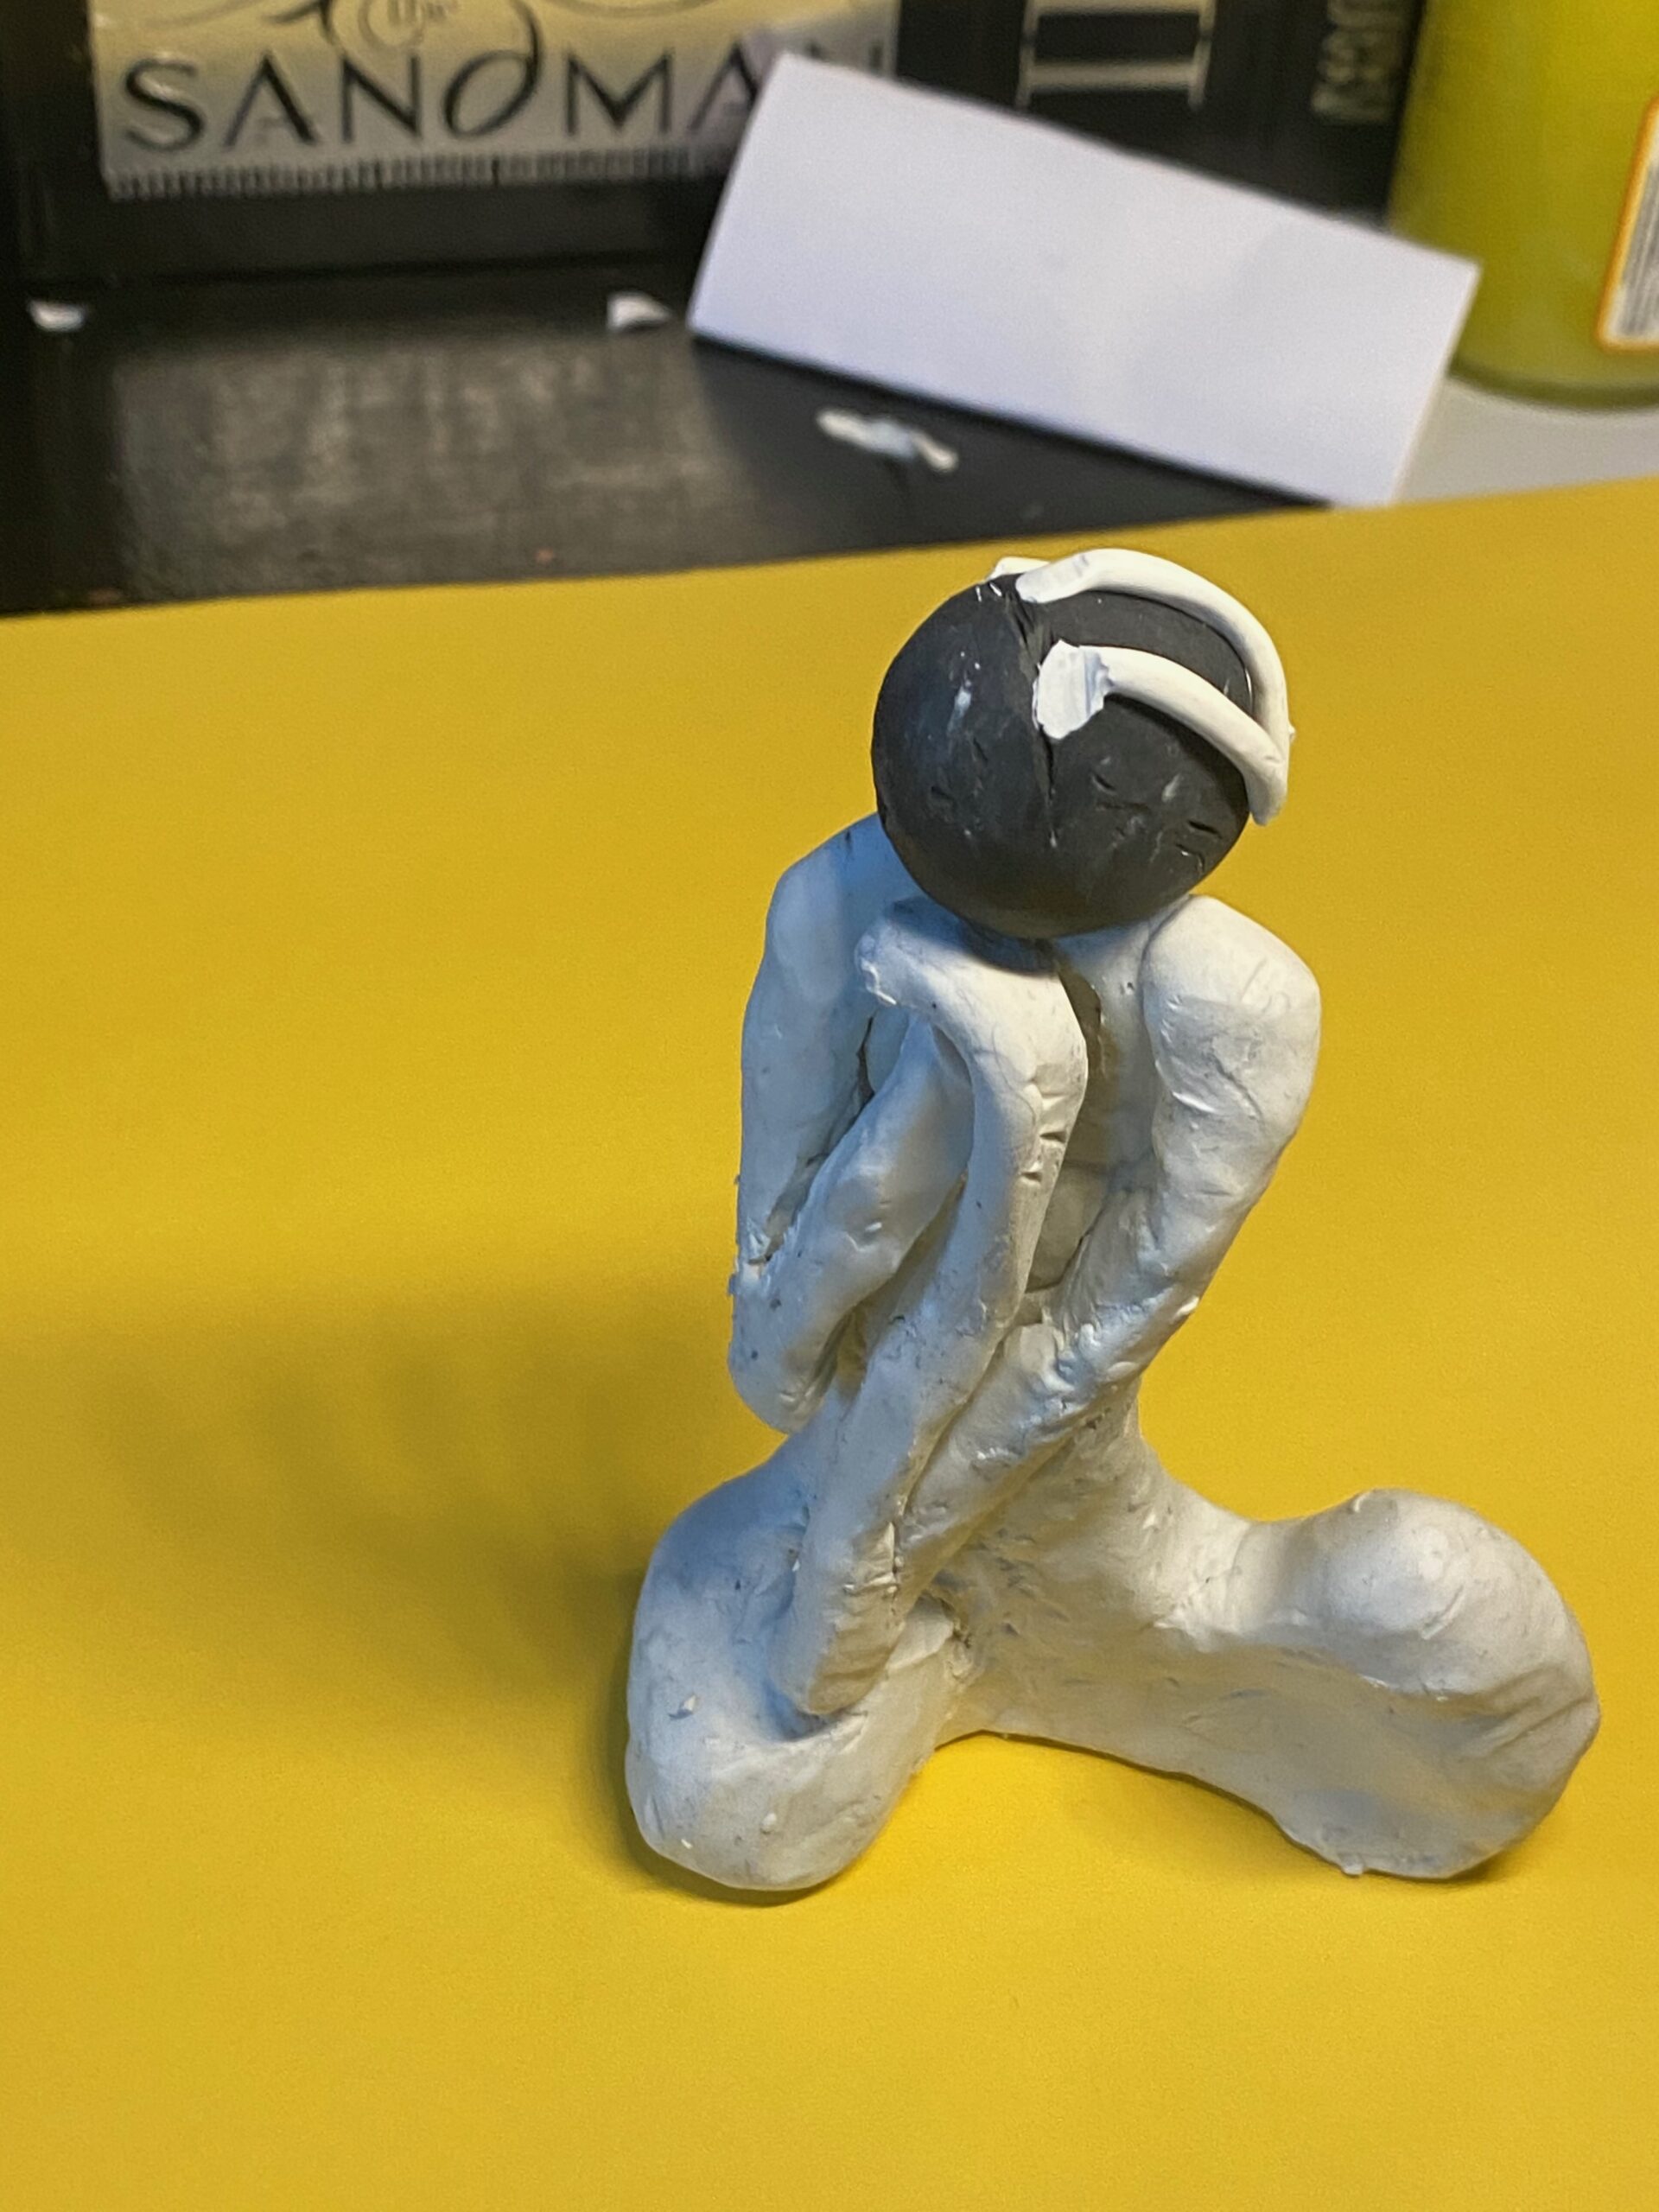
- Grade 6–8
- Subject Visual Arts
- Duration 4 sessions · 45 min
- Instructor Mr. George
Overview
Unit Context: Clay as a material for thinking · fourteen changes to clay · a seated figure built from big masses, then drawn
Big Idea
Clay remembers every move a hand makes. Students discover how clay can be constructed, deconstructed and transformed, then ask what happens to a body when it sits, and build a seated figure that answers with weight, balance and pose.
The central question is: What happens to a body when it sits, and how can clay show it?
The unit moves from material play to a figure: fourteen named changes, a free “make something” from those changes, thumbnail sketches of seated bodies, a sculpture built big-masses-first, and a final drawing of the finished sculpture, so form moves from 2D to 3D and back again.
Planning note: Built from KC George’s 2021 clay explorations (changes to clay, make something, and the seated figure). Choose one clay type and teach its joining method: plasticine and air-dry clay are not interchangeable, and firing and glazing are not part of this unit.

Unit at a Glance
| # | Session and goal | Time |
|---|---|---|
| 1 | Fourteen changes to clayConstruct, deconstruct and transform clay and name each change. | 45 min |
| 2 | What happens when you sit?Sketch seated bodies and turn my changes into a first small form. | 45 min |
| 3 | Build the seated figureBuild my seated figure from big masses so it stands and holds its pose. | 45 min |
| 4 | Refine, then draw the sculptureRefine my figure and draw it, moving from 3D back to 2D. | 45 min |
| 4 sessions | 180 min |
Artists for Looking
Seated figures across time and place: a seated figure from the Middle Niger region (13th century); an Olmec seated figure; a West Mexican Nayarit seated male (about 200 BCE–200 CE); Henry Moore’s maquettes for seated and reclining figures; Elizabeth Catlett’s seated women; and Wangechi Mutu’s The Seated sculptures (2019), made for the façade of The Metropolitan Museum of Art. Ask students how each artist shows weight resting on a seat, and which parts carry the pose.
Project works from museum collection pages and do not redistribute high-resolution copies.
NYS Visual Arts Standards Alignment
- VA:Cr1.2.6a–8a Creating: investigating a material through play. Fourteen changes to clay.
- VA:Cr2.1.6a–8a Creating: experimenting to develop an idea. Building the seated figure.
- VA:Cr3.1.6a–8a Creating: reflecting and revising. The balance and six-foot check.
- VA:Re7.1.6a–8a Responding: how art from different times shows the body.
Instructional Outcomes (Objectives)
- Studio / Experiential Students will produce and name at least ten changes to clay, then build a stable seated figure from large masses.
- Cognitive / Analytical Students will explain what happens to the body when it sits, and point to how their sculpture shows weight and balance.
Key Vocabulary
- Construct / deconstruct / transform Building up (pile, stack, drape), taking away (poke, tunnel through), and changing shape (bend, squeeze, roll, pinch, twist, pound, fold, wrap, texture).
- Mass The solid bulk of a form.
- Plasticity / malleability How easily clay bends and holds a new shape.
- Maquette A small model for a larger sculpture.
- Parts-to-whole / whole-to-whole Building from separate pieces, or pulling a form out of one lump.
- Score and slip Roughen two surfaces and add wet clay to join them (air-dry or water-based clay only).
Materials & Resources
- Clay: plasticine (oil-based) or air-dry clay, about a fist-sized ball per student, plus extra for the figure.
- Tools: craft sticks, plastic knives, dull pencils for texture, and a mat or board for each student.
- For air-dry clay only: a slip cup, a toothbrush or fork for scoring, damp paper towels and a sealed bag for storage between sessions.
- Drawing: charcoal or ink and paper for seated-figure thumbnails and the final drawing.
- Display: a numbered shelf for drying or storing figures.
Safety and care: keep clay off the floor and out of mouths, wipe tables with a damp cloth (do not sweep dry clay dust), and wash hands after each session. Plasticine never dries and is not fired; air-dry clay cracks if parts are too thin.
Differentiation
- Fine-motor supports Softer clay warmed in hands first, larger simpler masses, and a pre-made seat block to build on.
- Multilingual learners The fourteen changes are posted as verbs with photos, and students say or point to the change they used.
- Choice of figure A person they observe, a figure from literature or their own culture, or a mythological figure.
- Extension A two-figure group seated together, or a relief of the seated figure.
Anticipated Misconceptions
Misconception Detail first: eyes and fingers before the body exists.
Intervention Build three masses first and check the pose from six feet. Details come last, if at all.
Misconception Thin arms and legs will hold.
Intervention Keep limbs thick and attached to the body or seat. A pose that rests on the seat is stronger than one that sticks out.
Instructional Sequence
Four 45-minute sessions: entry (0–5), demo (5–12), studio (12–33), share (33–38) and reset (38–45).
Session 1Fourteen changes to clay
45 min
Today, I can… construct, deconstruct and transform clay and name each change.
Materials today: Clay, tools, mats, the changes chart.
Do Now: one squeeze
Every student gets a small ball of clay.
“Change it with one move. Name the move.”
Demo: three families
Show one construct, one deconstruct and one transform move, naming each.
“Every change has a name. Find as many as you can.”
Studio: the changes sampler
Students make and name at least ten changes on a mat, labeled with paper tags.
“Three that build up, two that take away, and as many transforms as you can.”
Check: Ten labeled changes on every mat.
Share: the surprising change
Each table shows the change that surprised them most.
“What did the clay do that you did not expect?”
Reset
Clay wrapped and bagged, tools counted, tables wiped damp, hands washed.
“Damp cloth, not a dry sweep.”
Session 2What happens when you sit?
45 min
Today, I can… sketch seated bodies and turn my changes into a first small form.
Materials today: Clay, charcoal or ink, paper, seated-figure references.
Do Now: sit and notice
Students sit, then stand, then sit again.
“What bends? Where does your weight go?”
Look: seated figures
Show two or three seated figures from the reference list. Point to where weight meets the seat.
“Which part of the body is doing the work?”
Studio: thumbnails, then a maquette
Four quick thumbnails of seated poses, then a small maquette from the changes sampler.
“Your thumbnail is the plan; the maquette tests it.”
Check: Four thumbnails and one small form.
Share: the pose that reads
Partners guess the pose from the maquette alone.
“Is this person relaxed, tired or alert? How can you tell?”
Reset
Maquettes stored on the numbered shelf; clay bagged.
“Label your work before it goes on the shelf.”
Absent last time? Do four seated thumbnails from a classmate or a reference, then start the maquette.
Session 3Build the seated figure
45 min
Today, I can… build my seated figure from big masses so it stands and holds its pose.
Materials today: Clay, tools, slip and scoring tools if using air-dry clay, a seat block.
Do Now: choose the pose
“Pick your best thumbnail. Circle the three big masses.”
Demo: masses first
Build head, torso, and hips and thighs on a seat block. Join them with the right method for your clay.
“No detail until the pose reads from six feet.”
Studio: build
Students build the three masses and the seat, then add thick limbs that rest on the body or seat.
“Turn your sculpture. Does it read from every side?”
Check: The figure sits without support.
Share: six-foot check
Students step back six feet and look.
“Does the pose read? What one change would make it clearer?”
Reset
Figures to the shelf; air-dry clay covered loosely with plastic.
“Cover it so it does not dry too fast.”
Absent last time? Use your maquette as the plan and build the three masses first.
Session 4Refine, then draw the sculpture
45 min
Today, I can… refine my figure and draw it, moving from 3D back to 2D.
Materials today: Figures, tools, charcoal or ink, paper, title cards.
Do Now: one refinement
“Write the one change that would make your pose clearer.”
Demo: draw what you built
Turn a sculpture to its best side and draw its big shapes in charcoal.
“Draw the masses, not the outline.”
Studio: refine and draw
Students make the one refinement, then draw the finished sculpture from its best side.
“How is the drawing different from your first thumbnail?”
Check: A refined figure and a drawing.
Share: title and statement
Each student titles the figure and names one change that shows weight or pose.
“Which change carries the pose?”
Reset
Final storage and cleanup.
Exit Ticket Prompt
Name the clay change that does the most to show your figure is sitting, and explain why.